Documentation
Web Automation
Guides for authoring, running and analysing tests across web automation, API and performance — plus setup, collaboration and release notes.
Recording
Capture browser interactions and convert them into testcase steps and actions automatically. Web automation only. Requires the Test Recorder Chrome extension. Steps appear live in the editor while you work in a browser tab. For building steps yourself without recording, see .
User action → Recorded action
Steps — New testcase (Rec)
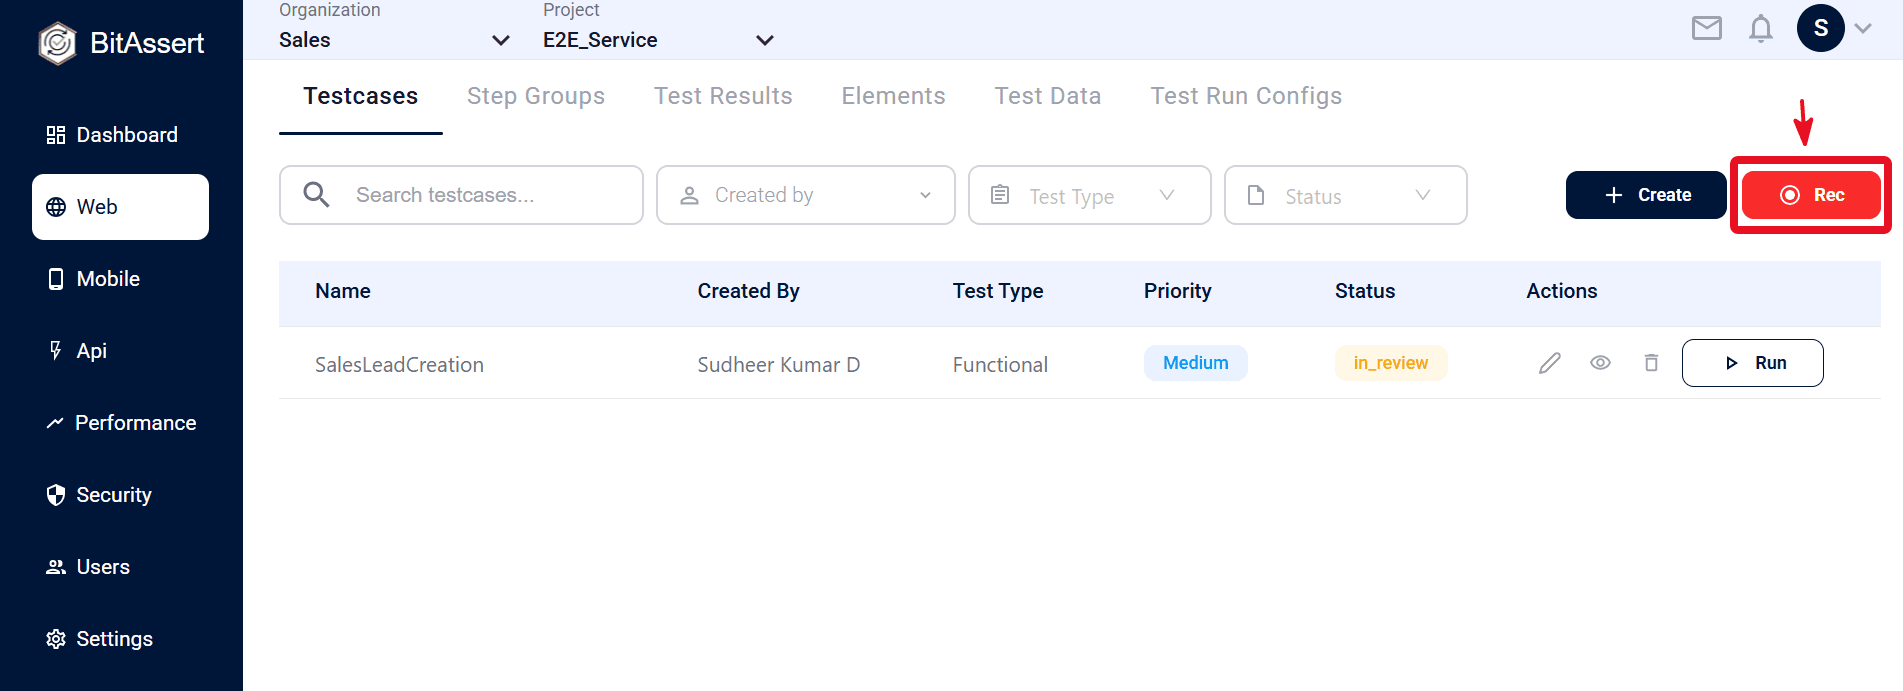
- Go to Web > Testcases and click Rec.
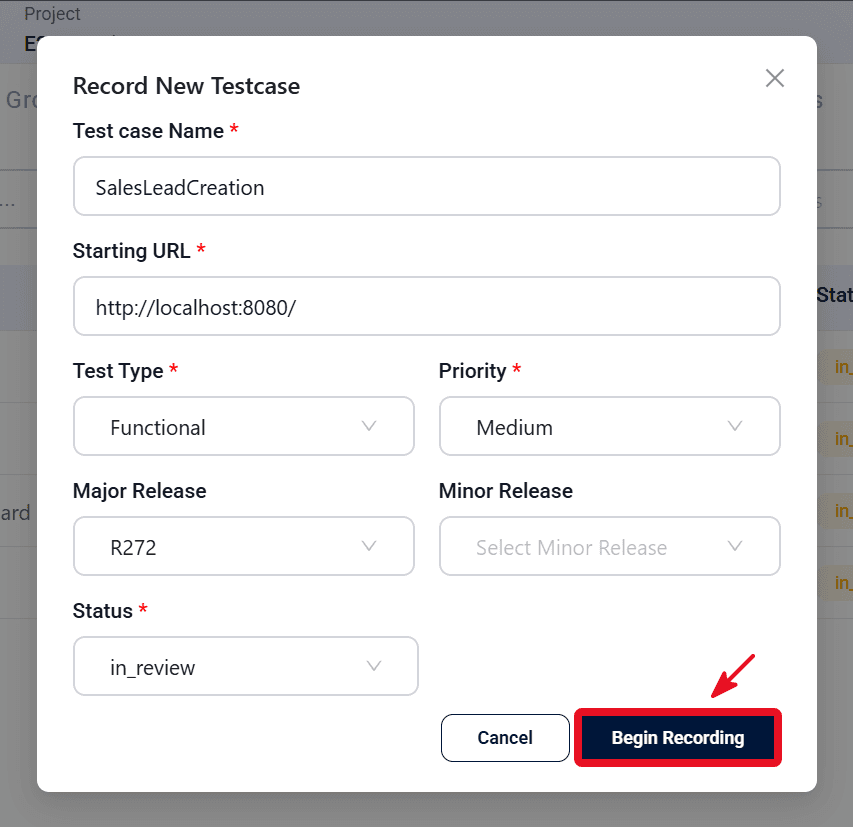
- In the Create Test modal, enter Test Name, Starting URL, Testcase Type, and Priority (optional: Status, releases).
- Click Begin Recording. A browser tab opens at the starting URL and steps stream into the Test Steps panel in real time.
- Perform the flow in the browser, then stop recording when finished.
- Review and rename steps or actions. For element actions, use Edit Element to save locators to the project.
- Click Save in the top bar.
Steps — Record More (existing testcase)
- Open Web > Testcases and click the testcase Name (see ).
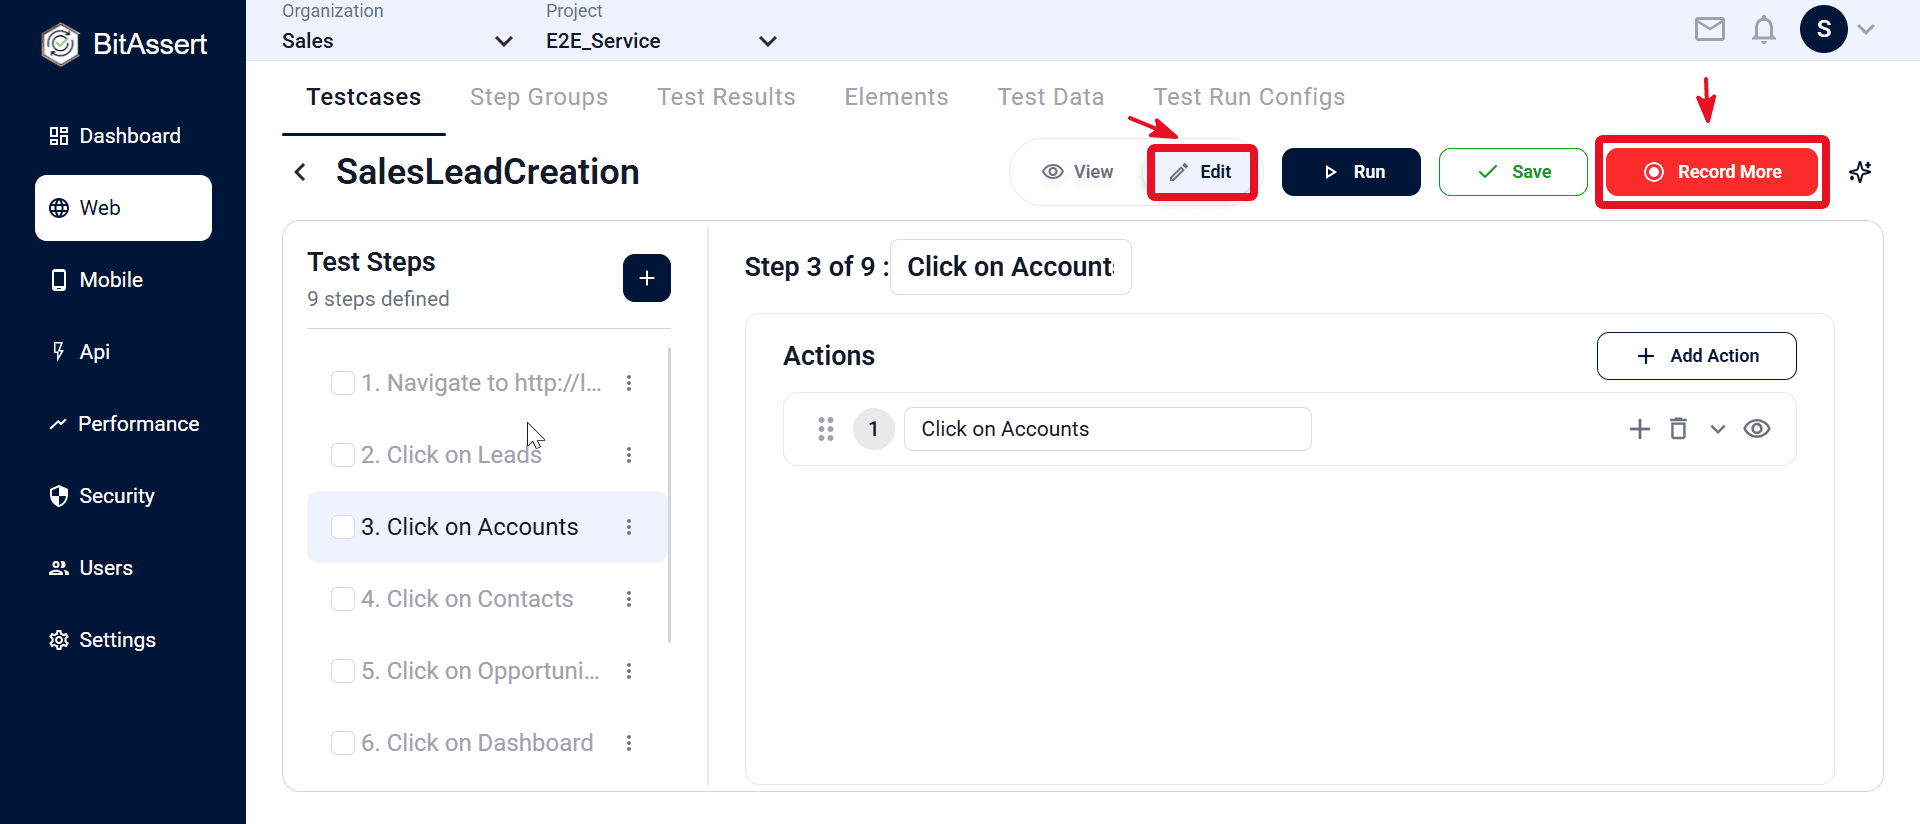
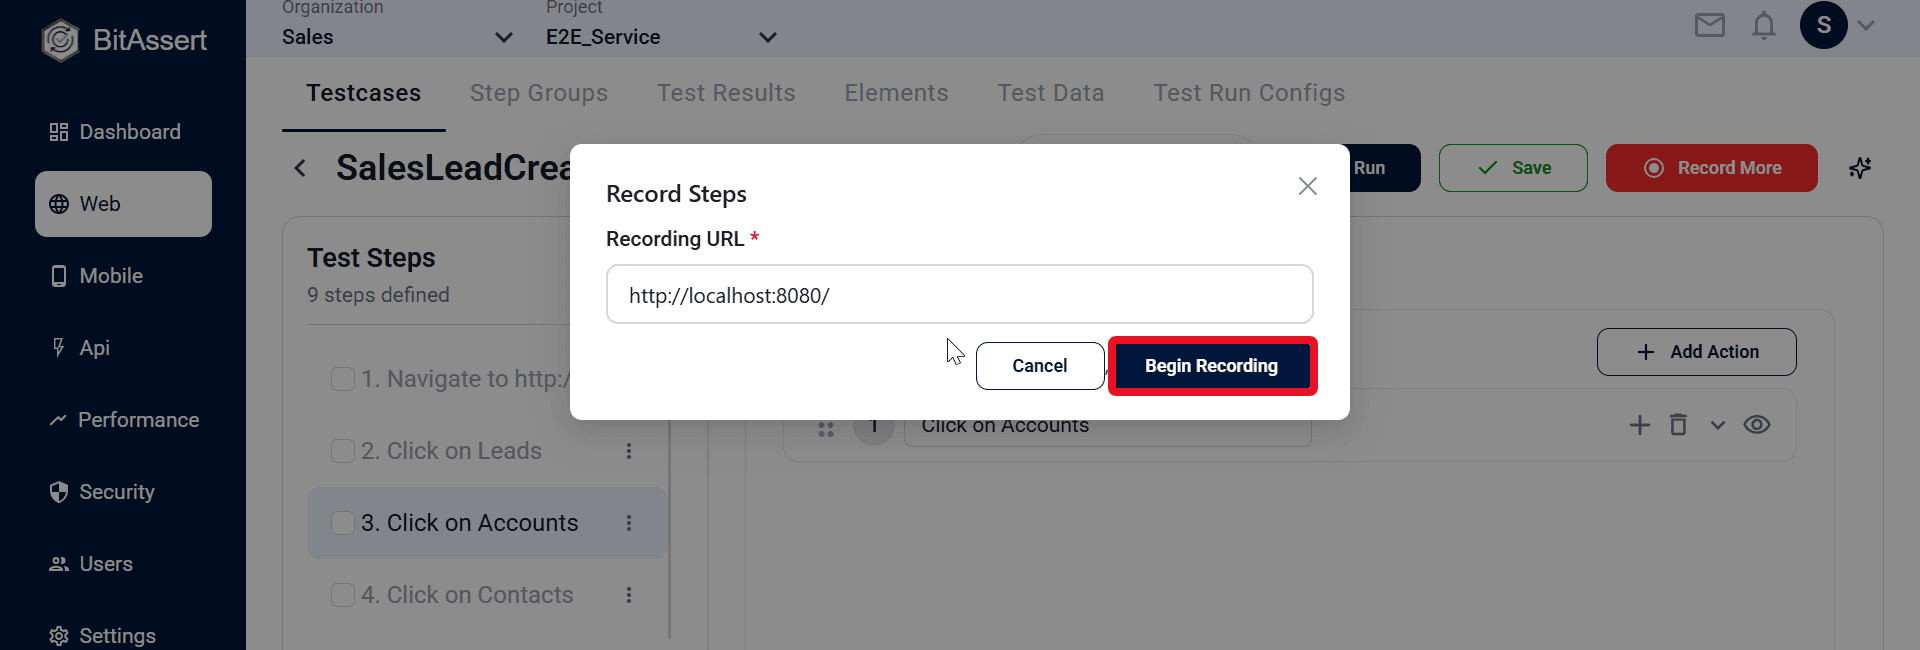
- Switch View → Edit,then click Record More in the top bar.
- Enter the URL if prompted, then click Begin Recording. A browser tab opens and new steps append to the existing Test Steps panel.
- Perform the additional flow in the browser, then stop recording when finished.
- Review and rename new steps or actions. Use Edit Element to save locators where needed.
- Click Save in the top bar.
Practical tips
- Record one clear flow at a time; use Record More on an existing testcase to append another segment.
- Avoid extra clicks and navigation noise; delete or disable unwanted steps after you stop recording.
- Stop recording before you review and Save—confirm steps stopped streaming in the left panel.
Expected outcome
A Web testcase with recorded steps and actions is saved and ready to execute with a test run config.