
Documentation
Web Automation
Guides for authoring, running and analysing tests across web automation, API and performance — plus setup, collaboration and release notes.
Manual
Build Web testcase logic in the editor by adding steps and actions manually. No recorder or browser extension is required. A step is a flow phase; an action is the command inside it (Click, Enter, Navigate To Url, Verify, Wait, IF, and similar).
Prerequisites
- Web testcase already created.
- Correct organization/project and non–Read-only access.
- Switch to Edit on the testcase details page before adding steps.
Manual authoring workflow
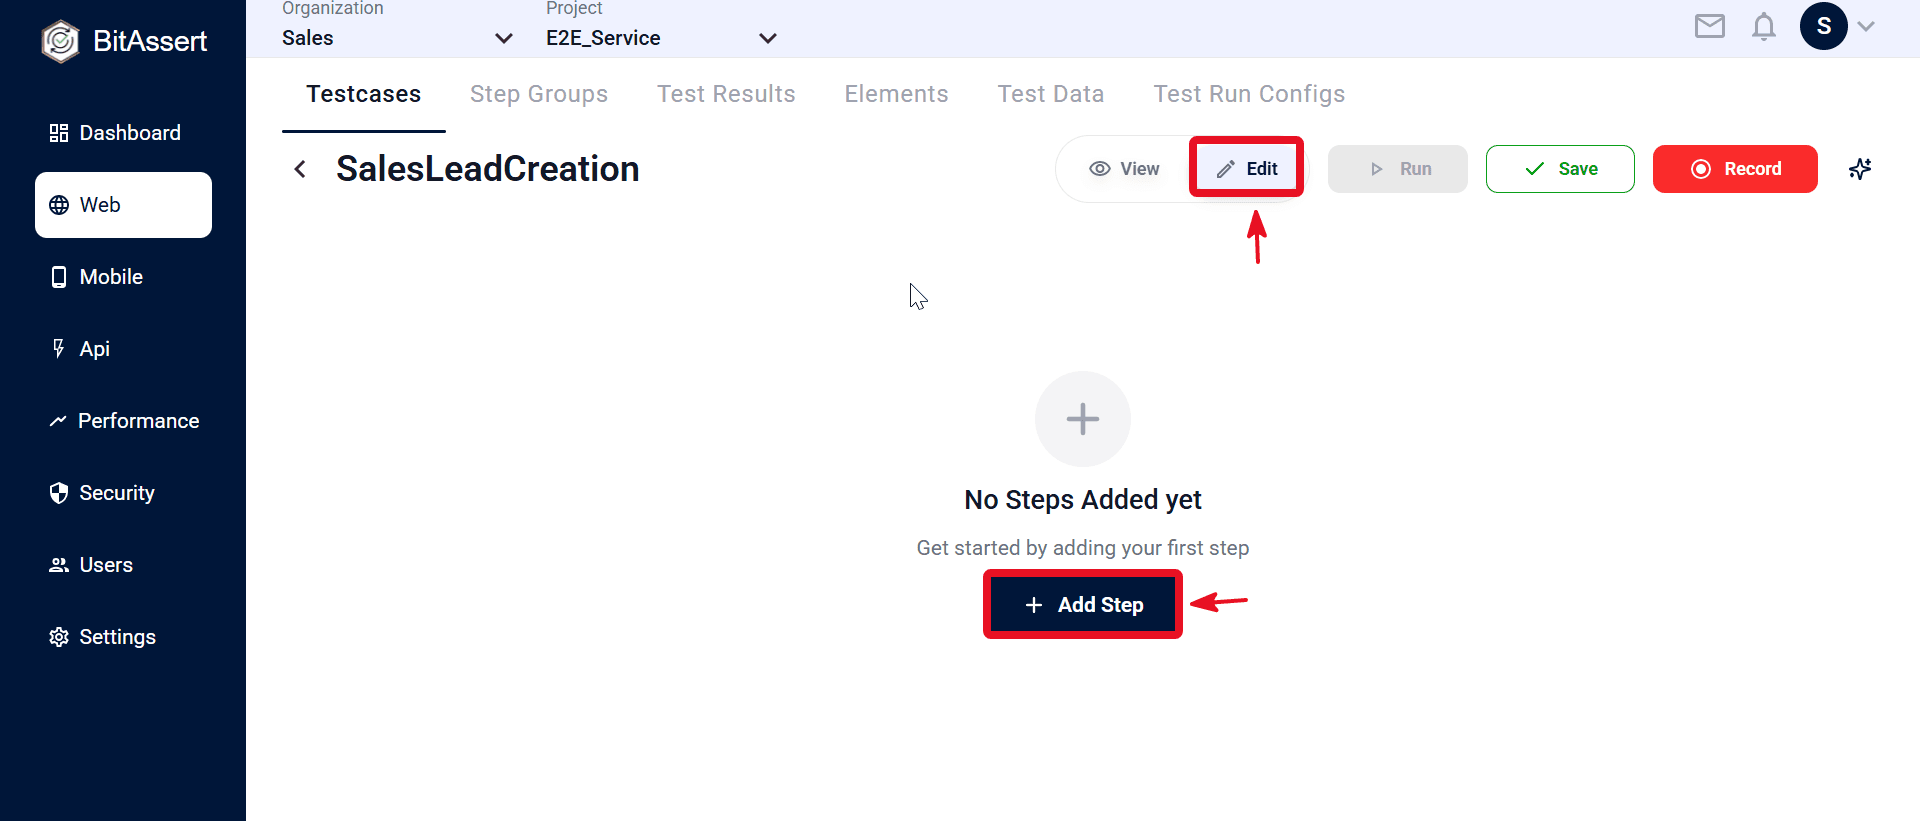
- Open the testcase from Web > Testcases and click the testcase Name (see ).
- Switch View → Edit, then click + Add Step.
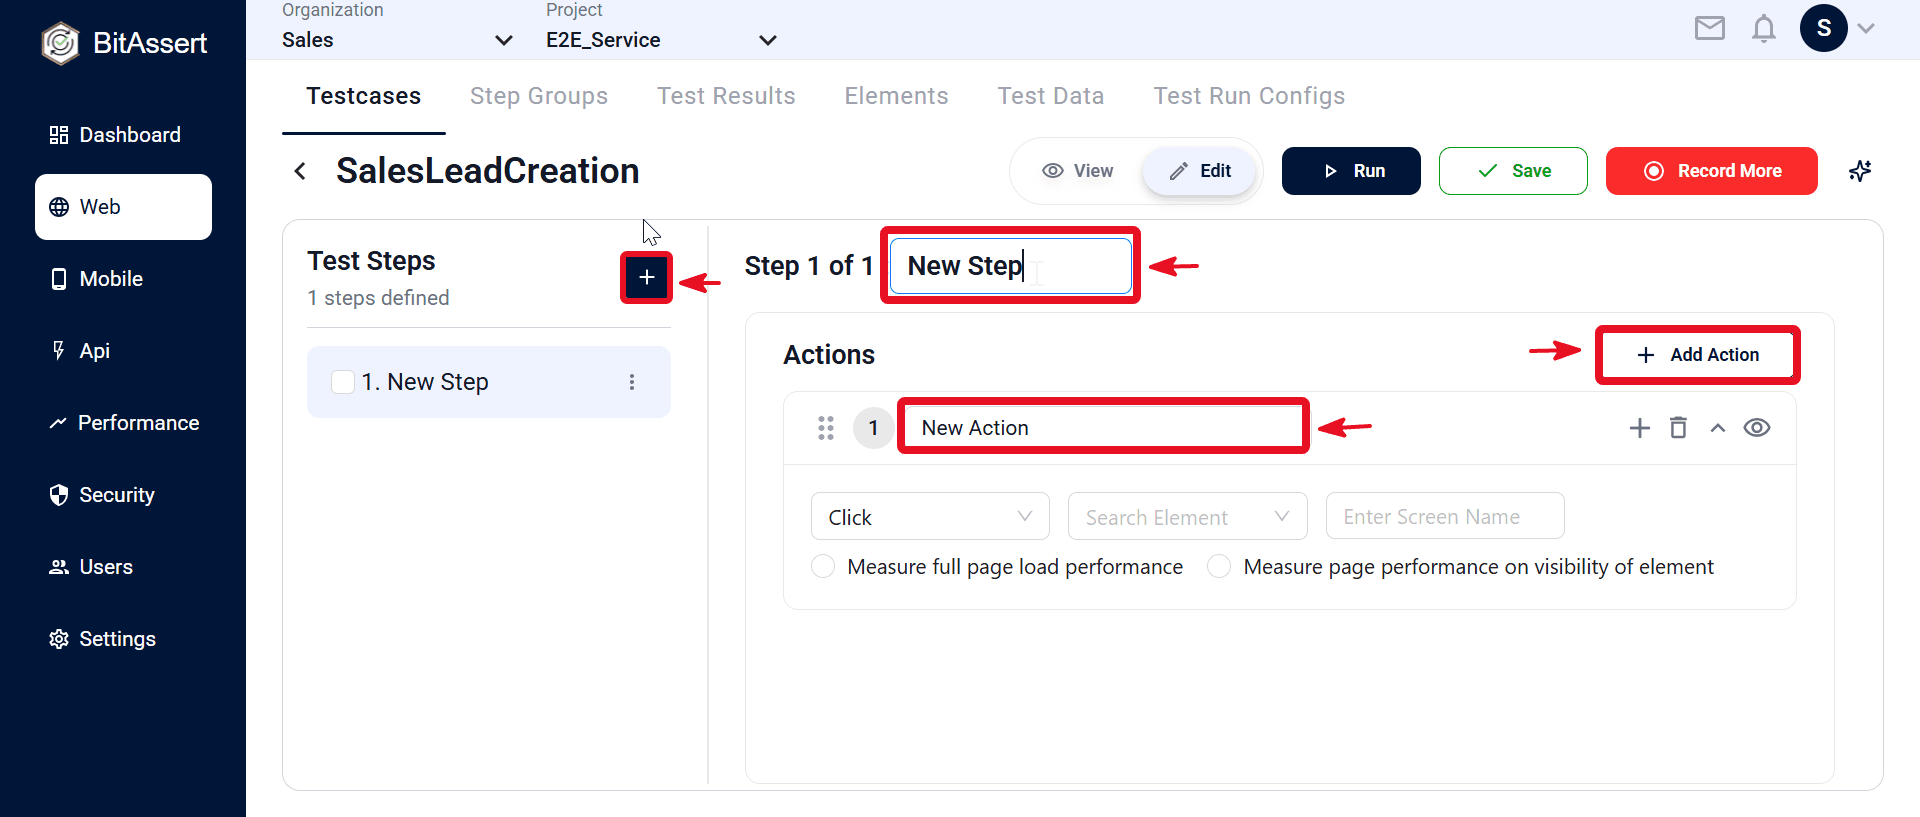
- Select the step in the Test Steps panel and enter a meaningful name in the step name field (replace the default New Step).
- In the Actions panel, click + Add Action for the selected step.
- To add more steps to the testcase, click + in the Test Steps panel, then rename the step and add actions as needed.
- Enter an action name and action type. In Search Element, pick an existing element or use + Add Item in the dropdown to create one—then set Screen Name and element name in the add form.
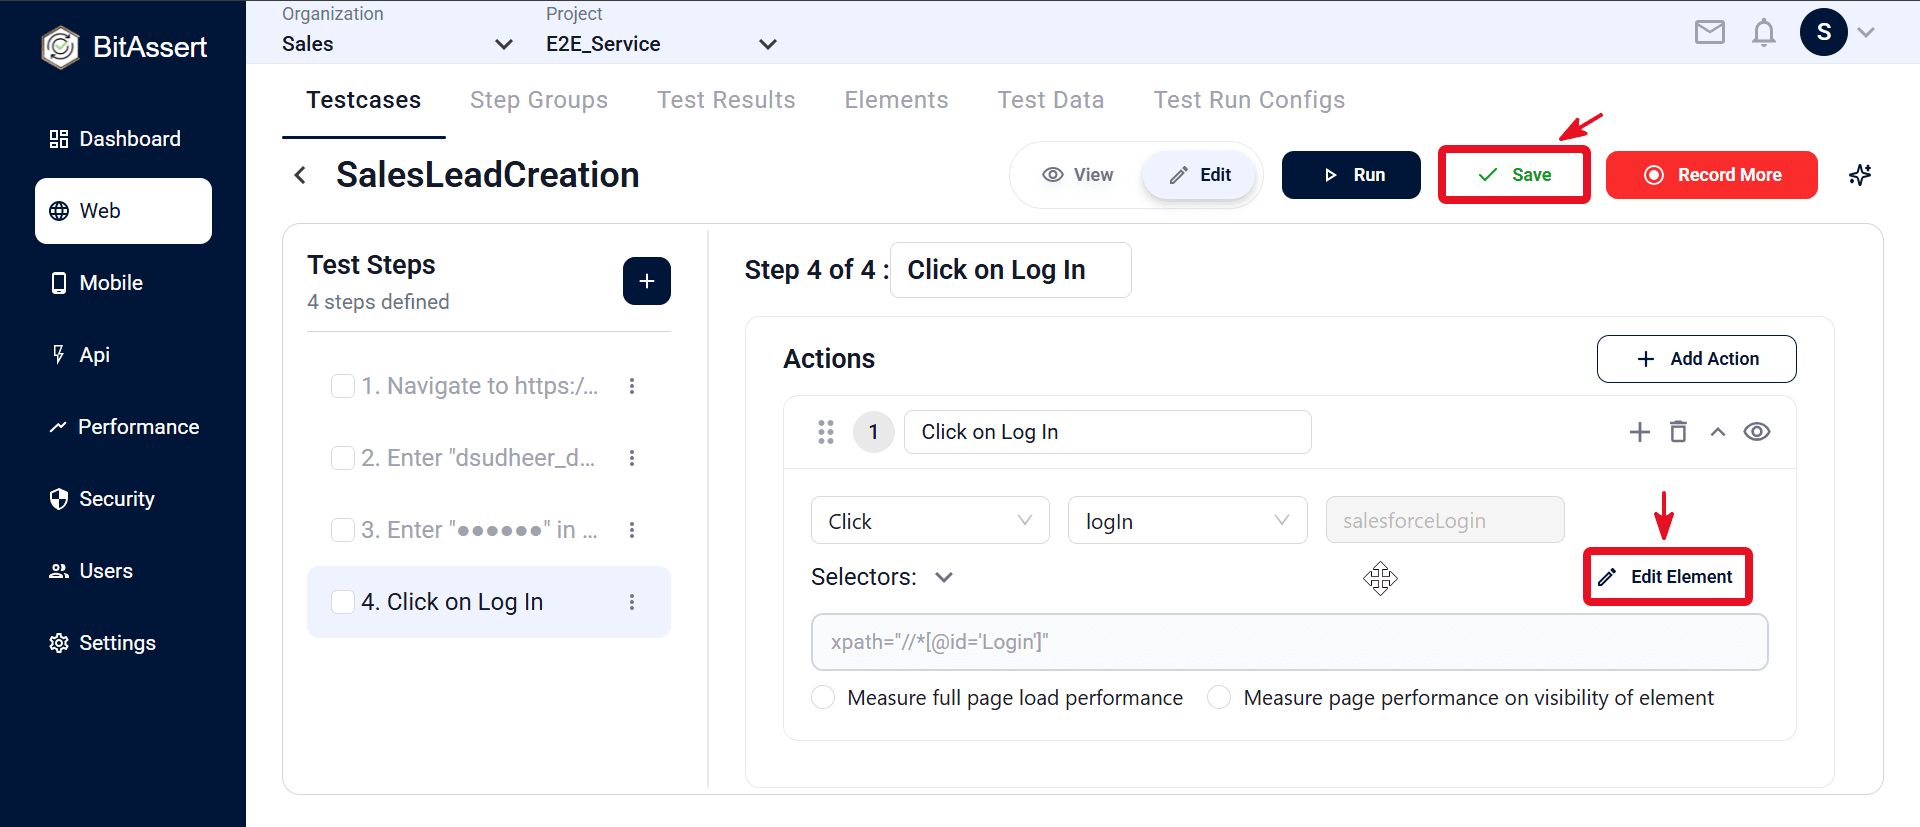
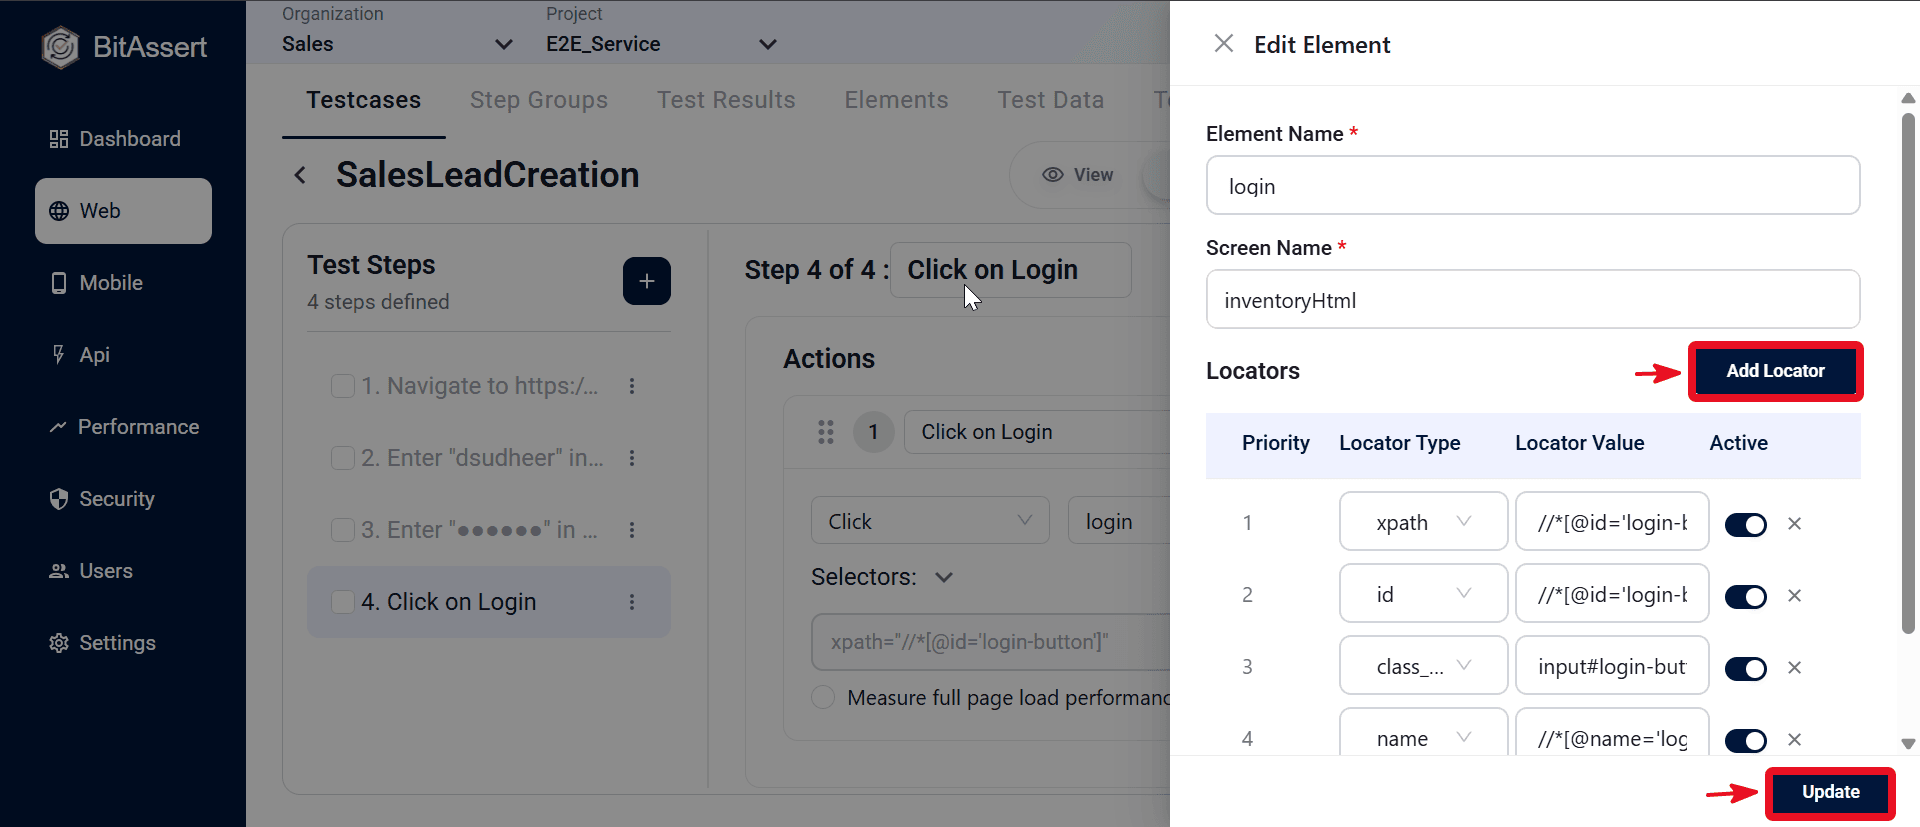
- To update the mapped element or locators, expand the action and under Selectors, click Edit Element. Adjust the element or selector (for example xpath, id, or name) in the element editor, then click Update.
- Click Save in the top bar to store the testcase.
Expected outcome
The Web testcase has steps with configured actions and is ready to run.
Common issues
- Cannot edit: use Edit mode; confirm you are not ReadOnly.
- Save warnings: fill required action fields.
- Flaky runs: use stable Elements and waits; start flows with Navigate To Url.