
Performance Testing
Guides for authoring, running and analysing tests across web automation, API and performance — plus setup, collaboration and release notes.
Data Sources (API Testcase / JMX / CSV)
A data source is the test content behind a performance run — the API requests or JMeter script executed under load. It defines what is tested; the performance testcase defines how many users run it, for how long, and how load ramps. For API load tests, link a functional API testcase or upload JMX; CSV applies only with JMX when the plan needs external data.
Note:
API load supports two data source modes: link an existing functional API testcase, or upload a JMX file (with optional CSV for JMeter data).
Source comparison
Quick reference — CSV is not a standalone source; it pairs with JMX only.
| Source | You provide | Load config in perf UI | CSV |
|---|---|---|---|
| API Testcase | Pick functional API testcase | Full control (users, duration, ramp) | Auto from @{...} if needed |
| JMX | JMX file (+ optional CSV) | Mostly from JMX | Manual CSV upload with JMX |
| CSV alone | Not supported | — | Must pair with JMX |
Choose a source — workflow
Create the performance testcase
- Open Performance > Testcases and click + Create Testcase.
- Enter Test Case Name and select Performance Type (perf_api_only) or (perf_api_web) for the API panel.
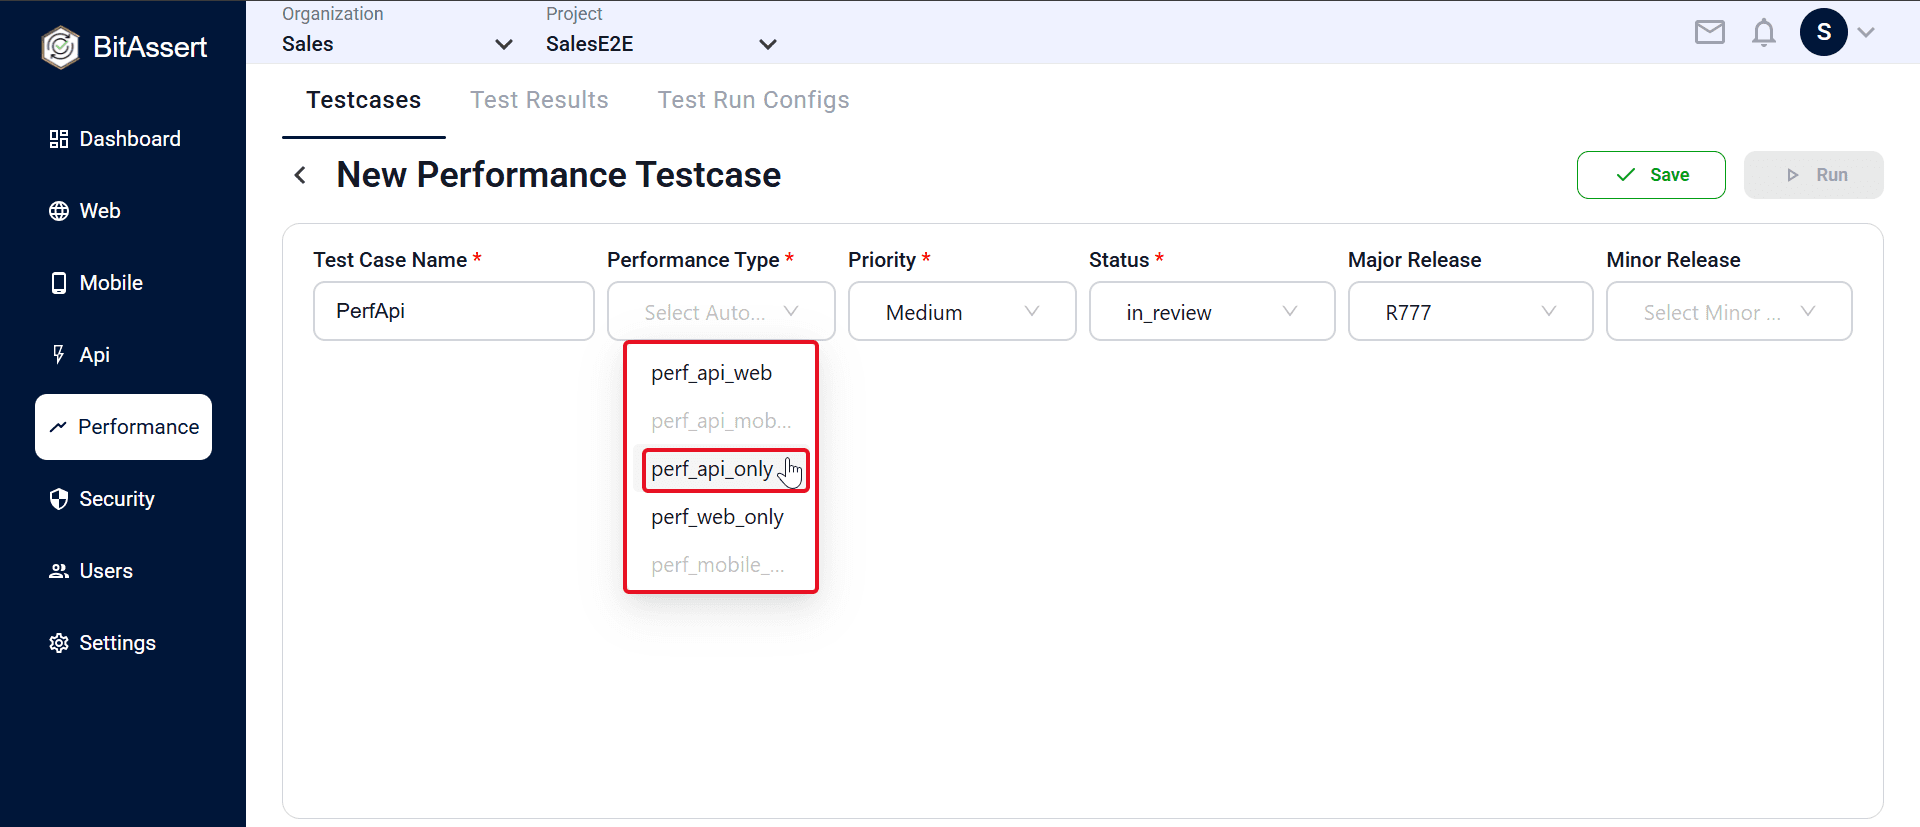
- In API Load Test Parameters, open Select API test source and choose We support JMeter Tests.
- In JMX & CSV Files, click or drag to upload your .jmx file (and optional .csv files). Confirm the file appears in the list (for example jmeter-example.jmx).
- After upload, confirm the panel shows Virtual Users, How should the test run? (Time-Based or Fixed Iterations), Duration or iteration count, and Ramp Up/Down Time populated from the JMX file (and CSV when used). These fields are read-only — you cannot edit them in the form.
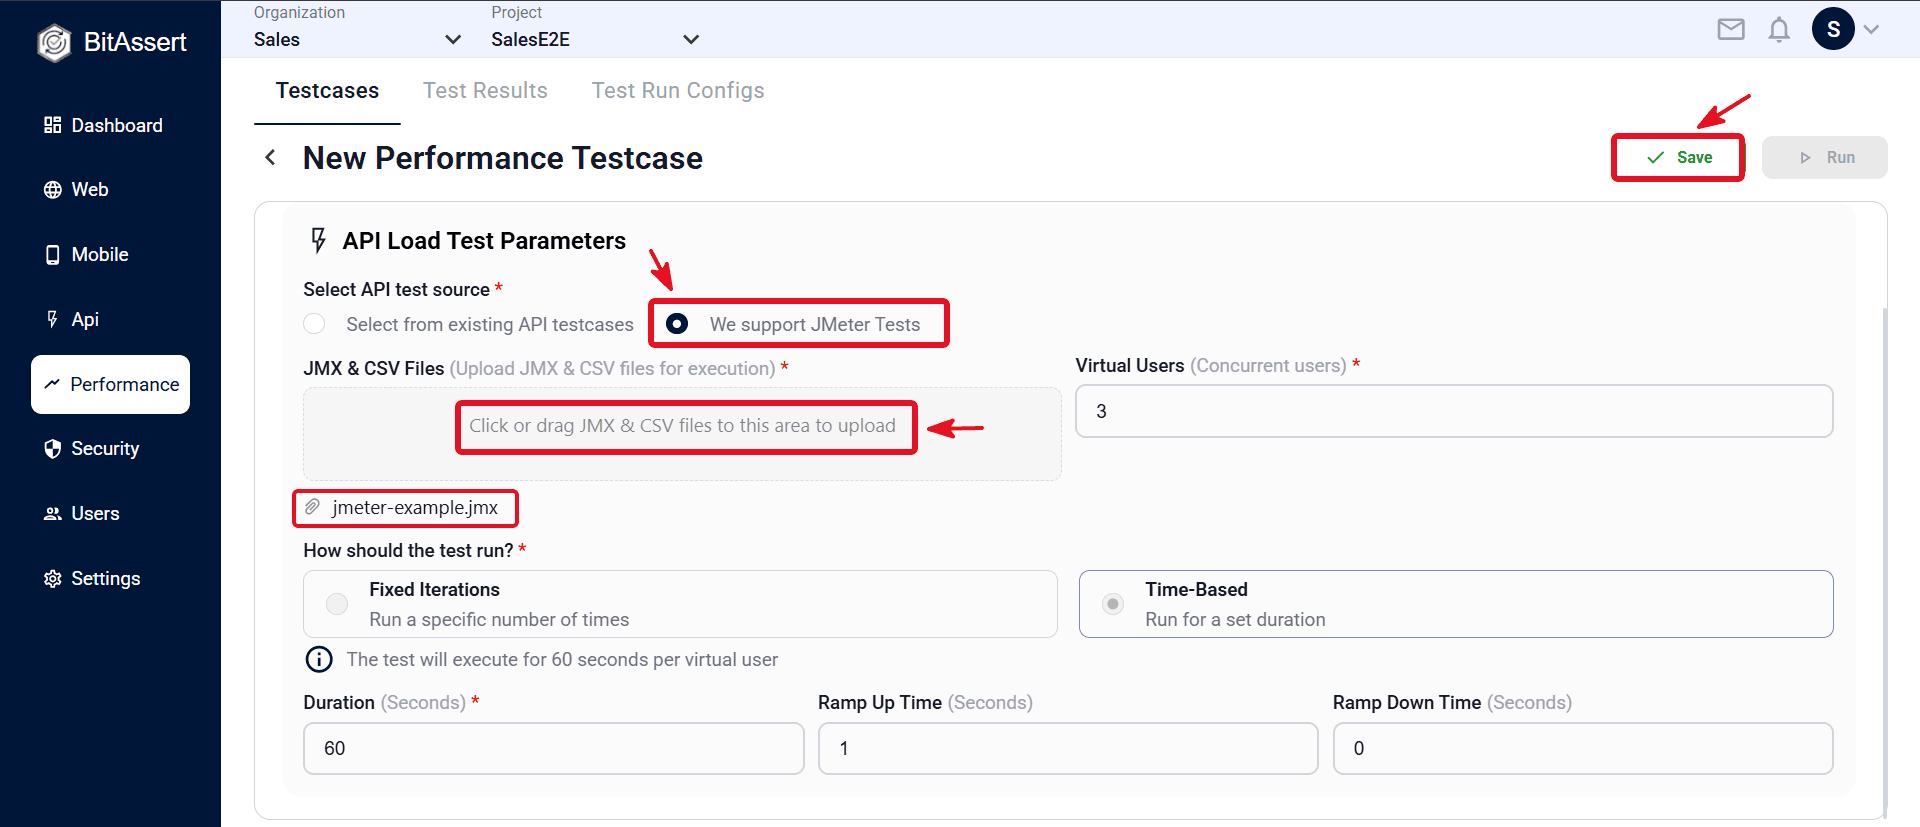
- Click Save. Confirm the uploaded JMX (and CSV, if any) appears on the form.
API Testcase path (alternate)
- In Select API test source, choose Select from existing API testcases and pick the functional testcase.
- Set Virtual Users, run type, duration or iterations, and ramp up/down, then click Save.
Examples
- API Testcase: Link “Checkout Flow” API testcase, 50 virtual users, 5-minute duration. Steps and @{email} test data come from the functional testcase.
- JMX + CSV: Upload load_test.jmx and users.csv. JMX defines threads and samplers; CSV supplies user rows for each virtual user.
Practical tips
- Prefer an existing API testcase when you already built and debugged requests in the platform; use JMX when you have a JMeter plan to run on the cloud agent.
- CSV is only for JMX — attach data files when your plan expects them; it is not a separate source on its own.
- Switching from JMX to API Testcase clears uploaded JMX and CSV files — save or export files first if you need them later.
Expected outcome
The API Load performance testcase has a clear source — linked functional API testcase or uploaded JMX (with optional CSV) — and load settings match the source type (full control for API Testcase; mostly JMX-driven when using JMX).
Common issues
- No API testcase in picker: create and save the functional testcase under API → Testcases first.
- Load fields disabled: JMX is selected — virtual users and ramp come from the JMX plan (or values imported on upload).
- Cannot remove JMX: upload a replacement JMX file when editing; you cannot clear JMX without a new upload.